Deciphering Your Glasses Repair Kit
- BY Catherine Ong
- IN Glasses
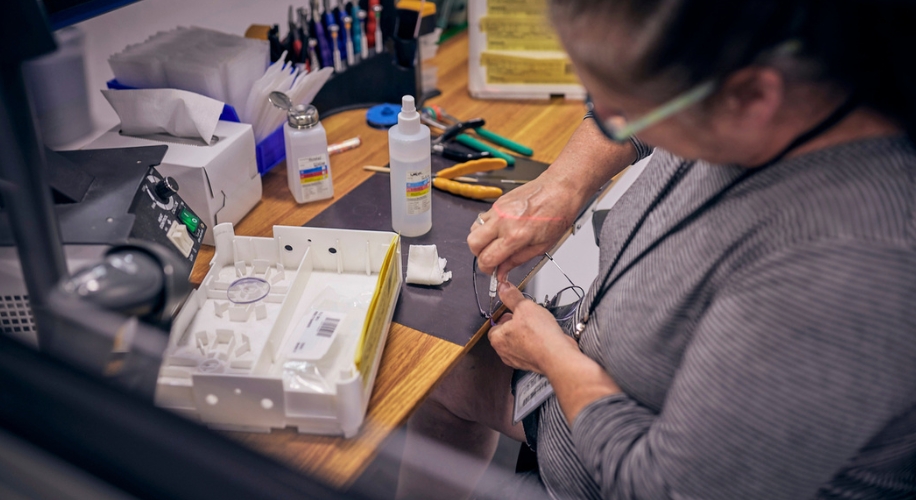
Whether you’ve accidentally dropped your glasses or simply need to make a few adjustments, having a glasses repair kit on hand can be a lifesaver. Equipped with essential tools and spare parts, these kits allow you to make quick and easy repairs from the comfort of your own home. For any adjustments beyond the simple repair, we recommend visiting your local optical shop for a consultation. Here’s a comprehensive guide on how to use all the tools in your glasses repair kit effectively.
Shop Zenni’s Eyeglasses Repair Kit
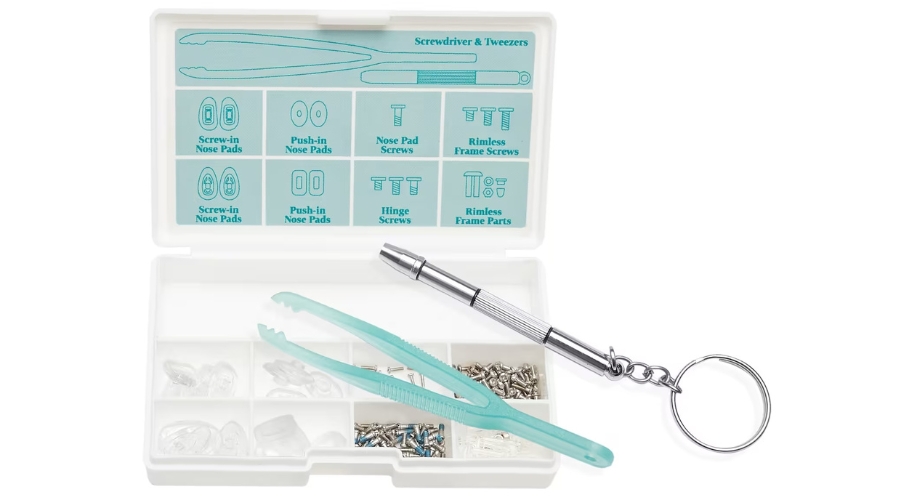
1. Tools: Screwdriver & Tweezers
Your glasses repair kit typically comes with a screwdriver and tweezers, which are essential for making adjustments and repairs. The screwdriver allows you to tighten or replace loose screws, while the tweezers help you handle small or delicate parts with precision.
2. Assortment of Screws
The kit also includes an assortment of screws in various sizes to fit different frame types. These screws may come with threadlocker adhesive to improve their fit and tightness. To replace a screw, simply use the screwdriver to remove the old screw and insert the new one into the screw hole. Tighten the screw carefully to ensure a secure fit without stripping the thread.
Pro Tip: If you have the original screw, compare it side by side with the screws in the tool kit to find the closest fit before trying it out!
3. Nose Pad Replacements
If your glasses have nose pads that are turning green or starting to crack, it’s a sign to exchange them. Nose pads are crucial for ensuring comfort and proper fit, so it’s essential to replace them when they become worn or damaged. Use the tweezers to remove the old nose pads and insert the new ones into place.
Pro Tip: For teardrop-shaped nose pads, make sure that the tapered side is towards the top of the frame, while the rounded, wider side is towards the bottom. This helps distribute the weight evenly over your nose.
4. Rimless Frame Parts
For maintaining rimless frame styles, your repair kit may include specific parts that help create that floating-lens illusion. The bushing piece is used to secure the lenses to the frame without the need for screws. Here’s how to place a bushing piece on front-mounted frames:
- Ensure your frame and the lens is free of any silicone or plastic debris. Consider using a push pin or pliers to help.
- Insert the prongs of the bushing piece through the drill holes from the back of the lens (the part closer to your face).
- Use clippers to trim the prongs short, but not flush to the front side of the lens. A small amount of cushion prevents your lens from being scratched or damaged.
- Once in place, gently press the frame into the bushing piece until it snaps securely into position.
- Secure the frame by using wide or blunt pliers to gently squeeze the lens and the frame together.
Shop Zenni’s Eyeglasses Repair Kit
By following these steps and utilizing all the tools and parts in your glasses repair kit, you can easily make adjustments and repairs to your eyewear whenever needed. Keeping your glasses in good condition ensures optimal comfort and visual clarity, allowing you to enjoy clear vision day in and day out.